기본 시스템 구조
Copy Filter
- 최종 화면부터 생성한 그래픽스 결과를 사본으로 관리
- Downsampling + Threshold
 BuildFilters 함수 중에

// 해상도를 낮춰서 다운 샘플링
 auto copyFilter =
     make_shared<ImageFilter>(m_device, m_context, L"Sampling", L"Sampling",
                              m_screenWidth, m_screenHeight);
 copyFilter->SetShaderResources({m_shaderResourceView});
 m_filters.push_back(copyFilter);

 auto downFilter = make_shared<ImageFilter>(
     m_device, m_context, L"Sampling", L"Sampling", m_screenWidth / m_down,
     m_screenHeight / m_down);
 downFilter->SetShaderResources({m_shaderResourceView});
 downFilter->m_pixelConstData.threshold = m_threshold;
 downFilter->UpdateConstantBuffers(m_device, m_context);
 m_filters.push_back(downFilter);
쉐이더 코드
Texture2D g_texture0 : register(t0);
SamplerState g_sampler : register(s0);

cbuffer SamplingPixelConstantData : register(b0)
{
    float dx;
    float dy;
    float threshold;
    float strength;
    float4 options;
};

struct SamplingPixelShaderInput
{
    float4 position : SV_POSITION;
    float2 texcoord : TEXCOORD;
};

float4 main(SamplingPixelShaderInput input) : SV_TARGET
{
    float3 color = g_texture0.Sample(g_sampler, input.texcoord).rgb;
    float l = (color.x + color.y + color.y) / 3;

    if (l > threshold)
    {
        return float4(color, 1.0f);
    }
    else
    {
        return float4(0.0f, 0.0f, 0.0f, 0.0f);
    }
}
Blur X / Blur Y Filter
- 가운시안 블러가 통상적으로 1D 패시지를 이용
- X, Y 방향을 보따 구현
- Blur 수행 횟수 및 확장 개수 조정 가능
- 가우시안 필터
- BlurXPixelShader, BlurYPixelShader
- cpp Render 함수에서 블러 쉐이더 적용하는 코드. 반복문으로 블러를 몇번 넣을지 결정
-
    for (int i = 0; i < m_repeat; i++) {
        auto &prevResource = m_filters.back()->m_shaderResourceView;
        m_filters.push_back(make_shared<ImageFilter>(
            m_device, m_context, L"Sampling", L"BlurX", m_screenWidth / m_down,
            m_screenHeight / m_down));
        m_filters.back()->SetShaderResources({prevResource});

        auto &prevResource2 = m_filters.back()->m_shaderResourceView;
        m_filters.push_back(make_shared<ImageFilter>(
            m_device, m_context, L"Sampling", L"BlurY", m_screenWidth / m_down,
            m_screenHeight / m_down));
        m_filters.back()->SetShaderResources({prevResource2});
    }
쉐이더 코드
int i;
for (i = 0; i < 5; i++)
{
    color += weights[i] * g_texture0.Sample(g_sampler, input.texcoord + float2(dx, 0.0) * float(i - 2)).rgb;
}

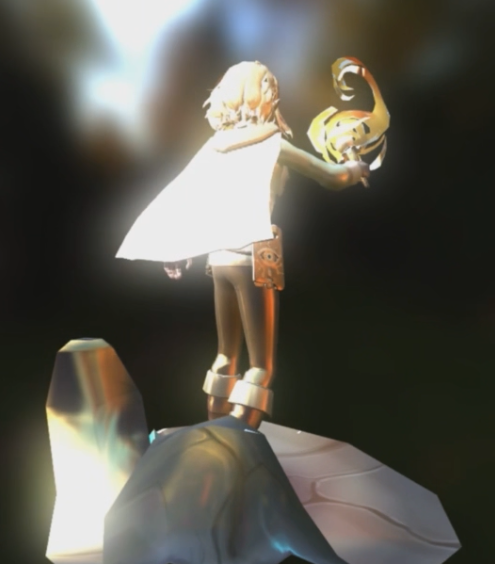
- Combine Filter
- 원본 이미지 + 블러 결과의 결합
- Bloom Strength 및 가우시안
- 블룸 효과 처리
-
프로세스 방식
1. Downsampling
- 다음의 순서로 해상도를 낮체게 된 후:
- 절반으로 downsample
- 다시 절반으로 downsample
- ... (가장 낮은 해상도 까지)

2. Blur in Low Resolution
- 가장 낮은 해상도에서 가운시안 블러 수행
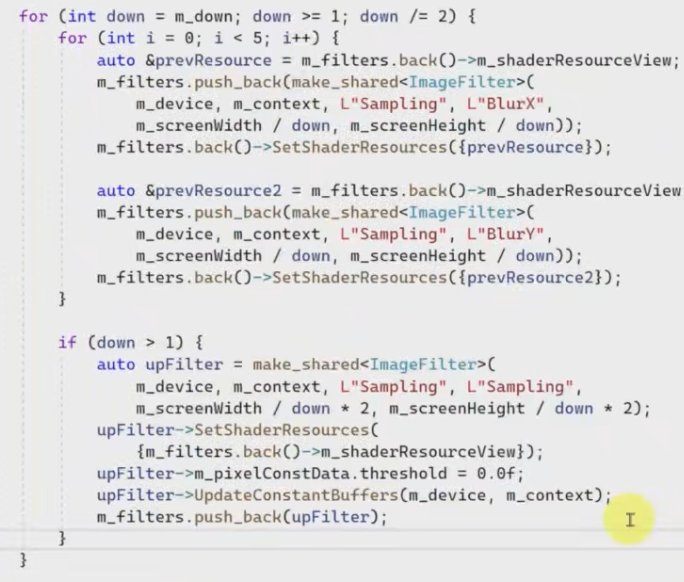
3. Upsampling + Blur
- 두 번씩 upsample (해상도 개보)
- Blur X / Blur Y 를 다음 해상도에 적용
- 최종 해상도가 될 때까지 반복
4. Combine
- 가장 보고 있는 그래픽스 결과가 후처리 및 가운시안과 합치는 단계
- Combine Shader: Output = Original + Blurred * Strength
마지막 원본이랑 후처리 텍스처 합치기.
Texture2D g_texture0 : register(t0);
Texture2D g_texture1 : register(t1);
SamplerState g_sampler : register(s0);

cbuffer SamplingPixelConstantData : register(b0)
{
    float dx;
    float dy;
    float threshold;
    float strength;
    float4 options;
};

struct SamplingPixelShaderInput
{
    float4 position : SV_POSITION;
    float2 texcoord : TEXCOORD;
};

float4 main(SamplingPixelShaderInput input) : SV_TARGET
{
    float3 color0 = g_texture0.Sample(g_sampler, input.texcoord).rgb;
    float3 color1 = g_texture1.Sample(g_sampler, input.texcoord).rgb;

    return float4(color0 + strength * color1, 1.0f);
}
'DX' 카테고리의 다른 글
| Post Processing (0) | 2025.07.13 |
|---|---|
| fresnel 효과 (0) | 2025.07.13 |
| 이미지 기반 라이팅 (0) | 2025.07.13 |
| 환경 매핑(반사 매핑) (0) | 2025.07.13 |
| 큐브 매핑 (0) | 2025.07.13 |


